Monday, August 29, 2011

Crafts 4 Happily Ever Afters

Weddings are a celebration of TRUE love. Love that is going to be nourished and treasured.
and these crafts do just that. They celebrate the couple, and nourish the lucky ones involved

This first picture is of the pew flowers I made for the ceremony. Here they are clustered.
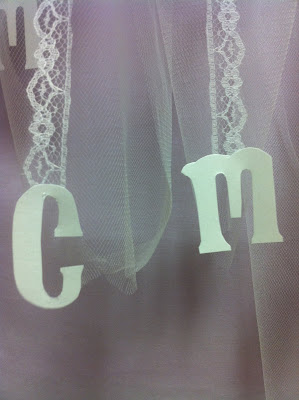
CLose up of the couples monogram. One M and C hangs below each
Individual pew flower. Each aisle seat will be graced with one.
Close up of the flowers. I was inspired by the tutorial @
http://dearlillieblog.blogspot.com/2011/04/crepe-paper-peonies-tutorial.html

These were major life savers at a few weddings this summer. Bridesmaid AID kits and of course the BRIDE gets some Bride AID to :)

Essential Items Included:
Gum (6 pieces was a good amount, and perfect for sharing too)
Tissue (at least three)
Band-aids (a few different sizes)
Safety pins (a few different sizes again)
bobbie pins (a few)
lip chap (1)
wet nap for after dinner (1)
always wips (1)
floss stick (1)
Q-tips (2, good for make up too)
Advil

Monday, August 8, 2011

CUDDLE time

Throughout the years I have collected t-shirts, many of which I wore for years... and years (I swear I have one from when I was 8, and it grew with me). One day I realized most of them did not fit right but I was not ready to throw them out or give them away. They were my proud collection. I wanted to remember all the amazing times in them. THE CONCERTS. My friends and all OUR stories. That's when I knew to making a quilt out of them was the ONLY option :)

It is now my personal blanket scrapbook...it's a flawless cuddler, and perfect for sharing.

These are the amazing instructions I followed, YOU CAN DO IT TO:

http://www.straw.com/quilting/articles/teequilts_how.html

OR -> If you have any questions leave a comment, Happy Cuddling :)

OR --> For a basic idea READ BELOW. Only 4 steps.

Step 1: Cut out a cardboard square 15 X 15... with this you will trace a square on all shirts so that all patches are equal size.
Step 2: Determine how big you want your quilt to be (mine took 20 tshirts). Once all squares are cut, iron on some interfacing to the back of all patches. This will ensure durability when sewing and will help your quilt last.
Step 3: With some fabric of choice cut long strips, first sew 15 inch strips to the bottom of each shirt and sew the strip to the next shirt, in the end you sh
ould have long strips of shirts. Next sew long strips all the from the top to the bottom of the t-shirt strips. Next sew all together
Step 4: Sew boarders on to the quilt and sew on the batting and back material of the quilt.